Hello everyone!!!
I hope you guys are ALL well. I've been busy crocheting and trying to keep up my little Etsy shop. It's been great, I LOVE IT!!! I have so many great people that have checked it out and said many, many nice things. I really, truly appreciate all the positive vibes everyone. Muuahhh!! Hugs and kisses for ALL of you. <3 <3
Before I get started on anything, I want to wish my Handsome, Adorable, Absolutely Scrumptious Grandson, Elias Nathaniel Dante, a very Happy 1st Birthday!!!!!! Grandma LOVES you!!!!!
Elias has brought us so much love. There is never a moment that goes by that you don't smile with this boy. He is a very happy healthy baby and he spreads that joy wherever he goes. He's like a ray of sunshine warming your soul. <3 <3
************************************************
I also want to wish my AMAZINGLY BEAUTIFUL grand-daughter LUNA BELLA WALKER, a very happy 2nd birthday. I have no pictures yet, since she is so far from me. I will try to get some pictures soon. I love her so much and miss her like you wouldn't believe. I will see her soon though.
I LOVE YOU LUNA!!!!
Happy Birthday Baby Girl. <3 <3
******************************************************
Well I can't wait to share with you some of the new things I have been working on. I'm very excited and have been very inspired.
Ok.... here I go.
First let me share this AMAZING new trick for making your very own personalized cloth labels AT HOME!!!!!
Here's what you'll need. You may have it at home already.

Cut the paper to regular paper size, or whatever size your printer takes. I did mine 8 1/2 X 11.

and a dull matte side.
Iron the shiny side down on the wrong side of the fabric, if your fabric happens to have a wrong side. My fabric was the same on both side, so it didn't matter what side I ironed the fabric on, but you may have a printed fabric. Don't touch the iron to the shiny side of the paper because it will stick.
So now you have a sheet that is fabric on one side and paper on the other.
Use your computer word program or some program to create the label that you want. Small and simple, I think is the best. It can be in color if you desire.
Print onto the fabric that you created. Check how to load your paper on the printer. My printer prints sheet facing down, so my fabric was on the bottom and the paper was facing up. I printed out one sheet at a time. Peel off the freezer paper. Lastly, just iron the printed sheet to set the color, and Presto!!!! Homemade personalized label or tag for my little creations.
So much fun and so exciting!!
**************************************
Go on over to my Etsy Shop and check out a few things I made.
Click on the picture and it will take you right to the page. Thanks again for looking.
Preciate it much!!!!
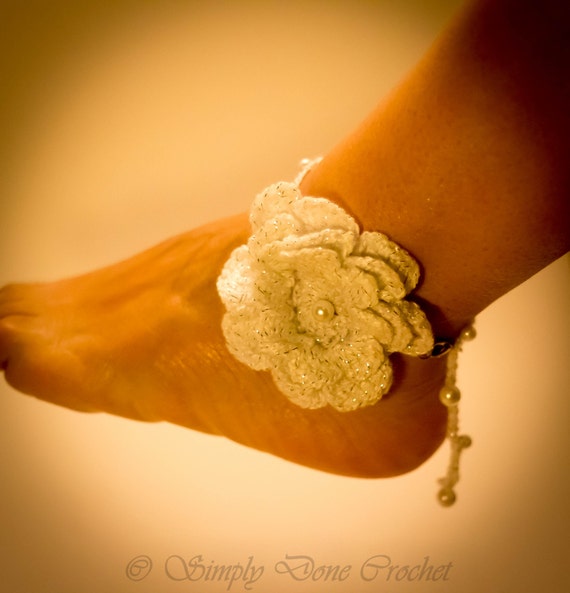
New at my shop: a very sweet and delicate flower and pearl anklet. Perfect for this summer to show off those great legs. ;)
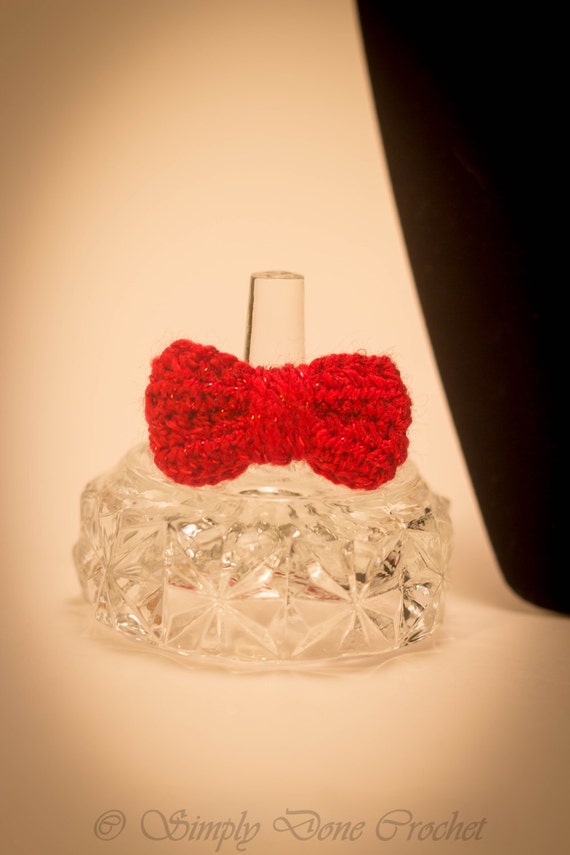
Trying to get with the style, I made this adorable adjustable sparkly bow ring.
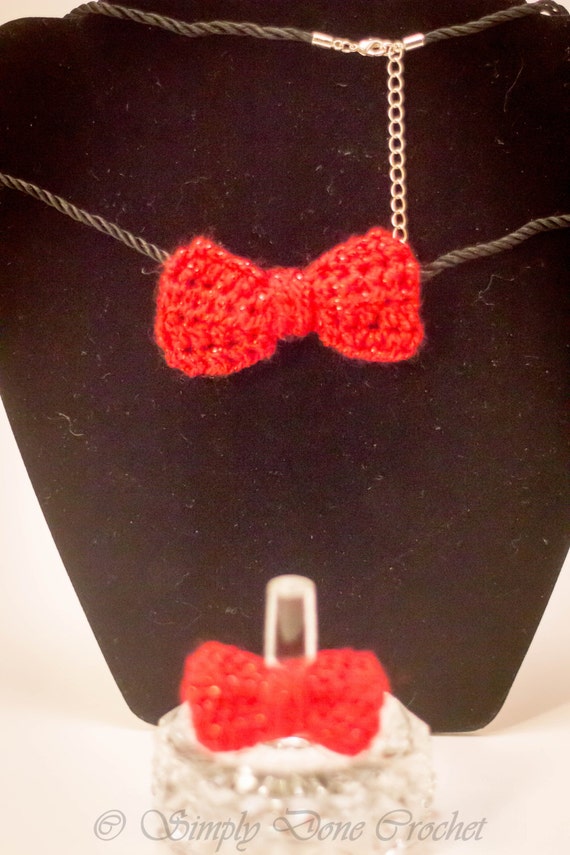
...and here is it's matching necklace.
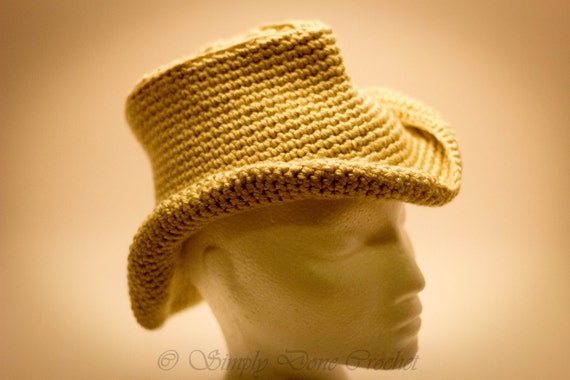
I also made these cute cowboy/girl hats for photo props or just fun.
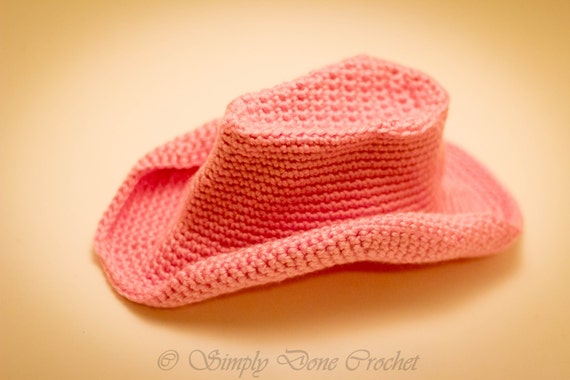
Pretty in pink. <3


First let me share this AMAZING new trick for making your very own personalized cloth labels AT HOME!!!!!
Here's what you'll need. You may have it at home already.
2 Tb. - Alum (Grocery store spice aisle)
2 1/2 Tsp. - Washing Soda (Laundry detergent aisle)
1/2 Tsp. - Liquid Fabric Softener
First mix 2 tablespoons of Alum, 2 1/2 teaspoons of Washing Soda (not baking soda) and 1/2 teaspoon of fabric softener. Then add one cup of HOT water. Make sure that the bowl you use isn't too small because it will foam up a bit. Stir it all together.
After a few minutes, the foam will disappear. Now you are ready to soak your 100% cotton fabric in the mixture. I used muslin for mine. (I had already cut my muslin sheets into paper size
8 1/2 X 11.)
Soak it for about 15 minutes.
After the 15 minutes, you need to squeeze out the liquid right back in the bowl, because you are going to want to save this mixture for later use. Do not rinse out the fabric. Believe me, you will do it again. It was so much fun to do. :D I put mine into a little red pepper jar that I had, and stored it in my cabinet.
Now you can either hang it up to dry or if you're are impatient like I am, put it in the dryer. Remember not to rinse it out. Leave the mixture liquid on it. That's the magic stuff!!!
(They sell this magic stuff at the stores. You may have heard of it. Bubble Jet Set. Too expensive!!)
OK, now here is what I did with that muslin after it was all prepped up.
I purchased at the Piggly Wiggly, some freezer paper. It was pretty cheap too. My favorite price, CHEAP... :D I just happened to be in the Zion area at my favorite get away; Illinois State Beach.

Cut the paper to regular paper size, or whatever size your printer takes. I did mine 8 1/2 X 11.
The freezer paper has a shiny side...

and a dull matte side.
Iron the shiny side down on the wrong side of the fabric, if your fabric happens to have a wrong side. My fabric was the same on both side, so it didn't matter what side I ironed the fabric on, but you may have a printed fabric. Don't touch the iron to the shiny side of the paper because it will stick.
So now you have a sheet that is fabric on one side and paper on the other.
Use your computer word program or some program to create the label that you want. Small and simple, I think is the best. It can be in color if you desire.
Print onto the fabric that you created. Check how to load your paper on the printer. My printer prints sheet facing down, so my fabric was on the bottom and the paper was facing up. I printed out one sheet at a time. Peel off the freezer paper. Lastly, just iron the printed sheet to set the color, and Presto!!!! Homemade personalized label or tag for my little creations.
So much fun and so exciting!!
**************************************
Go on over to my Etsy Shop and check out a few things I made.
Click on the picture and it will take you right to the page. Thanks again for looking.
Preciate it much!!!!

New at my shop: a very sweet and delicate flower and pearl anklet. Perfect for this summer to show off those great legs. ;)

Trying to get with the style, I made this adorable adjustable sparkly bow ring.
...and here is it's matching necklace.

I also made these cute cowboy/girl hats for photo props or just fun.

Pretty in pink. <3

<3 <3
Thank for e-visiting with me today. I LOVE your e-company.
Keep

always in your life,
AND

in your heart.


No comments:
Post a Comment