Monday, December 8, 2014

Long Time No Blog!!!

Hello everyone.  

My apologies.  It's been waaaaaay too long since I last blogged.  I have been very busy with my crochet and quite lazy at blogging.  I know, excuses, excuses.  You are correct.  But, looking on the bright side, I will have plenty to write about.  

Stay tuned.........

Monday, May 26, 2014

Finally It's Getting Warmer Out!!


Hello everyone!!!


I hope you guys are ALL well.  I've been busy crocheting and trying to keep up my little Etsy shop.  It's been great,  I LOVE IT!!!  I have so many great people that have checked it out and said many, many nice things.  I really, truly appreciate all the positive vibes everyone.  Muuahhh!!   Hugs and kisses for ALL of you. <3 <3  


Before I get started on anything, I want to wish my Handsome, Adorable, Absolutely Scrumptious Grandson, Elias Nathaniel Dante, a very Happy 1st Birthday!!!!!!  Grandma LOVES you!!!!!


Elias has brought us so much love.  There is never a moment that goes by that you don't smile with this boy.  He is a very happy healthy baby and he spreads that joy wherever he goes.  He's like a ray of sunshine warming your soul. <3 <3   

************************************************

I also want to wish my AMAZINGLY BEAUTIFUL grand-daughter LUNA BELLA WALKER, a very happy 2nd birthday.  I have no pictures yet, since she is so far from me.  I will try to get some pictures soon.  I love her so much and miss her like you wouldn't believe. I will see her soon though. 

I LOVE YOU LUNA!!!!  
Happy Birthday Baby Girl. <3 <3 


******************************************************


Well I can't wait to share with you some of the new things I have been working on.  I'm very excited and have been very inspired. 


Ok.... here I go.

First let me share this AMAZING new trick for making your very own personalized cloth labels AT HOME!!!!!


Here's what you'll need.  You may have it at home already.


2 Tb. -  Alum (Grocery store spice aisle)
2 1/2 Tsp. -  Washing Soda (Laundry detergent aisle)
1/2 Tsp.  -  Liquid Fabric Softener

First mix 2 tablespoons of Alum, 2 1/2 teaspoons of Washing Soda (not baking soda) and 1/2 teaspoon of fabric softener.  Then add one cup of HOT water.  Make sure that the bowl you use isn't too small because it will foam up a bit.  Stir it all together. 


After a few minutes, the foam will disappear.  Now you are ready to soak your 100% cotton fabric in the mixture.  I used  muslin for mine. (I had already cut my muslin sheets into paper size 
8 1/2 X 11.)  


Soak it for about 15 minutes.


After the 15 minutes, you need to squeeze out the liquid right back in the bowl, because you are going to want to save this mixture for later use. Do not rinse out the fabric. Believe me, you will do it again.  It was so much fun to do. :D I put mine into a little red pepper jar that I had, and stored it in my cabinet. 

Now you can either hang it up to dry or if you're are impatient like I am, put it in the dryer. Remember not to rinse it out.  Leave the mixture liquid on it. That's the magic stuff!!!  

(They sell this magic stuff at the stores.  You may have heard of it. Bubble Jet Set. Too expensive!!)

OK, now here is what I did with that muslin after it was all prepped up.  

I purchased at the Piggly Wiggly, some freezer paper.  It was pretty cheap too.  My favorite price, CHEAP... :D  I just happened to be in the Zion area at my favorite get away; Illinois State Beach. 


Cut the paper to regular paper size, or whatever size your printer takes.  I did mine 8 1/2 X 11. 


The freezer paper has a shiny side...

 
and a dull matte side.

Iron the shiny side down on the wrong side of the fabric, if your fabric happens to have a wrong side.  My fabric was the same on both side, so it didn't matter what side I ironed the fabric on, but you may have a printed fabric. Don't touch the iron to the shiny side of the paper because it will stick. 


So now you have a sheet that is fabric on one side and paper on the other. 

Use your computer word program or some program to create the label that you want. Small and simple, I think is the best.  It can be in color if you desire. 


Print onto the fabric that you created.  Check how to load your paper on the printer.  My printer prints sheet facing down, so my fabric was on the bottom and the paper was facing up.  I printed out one sheet at a time. Peel off the freezer paper. Lastly, just iron the printed sheet to set the color, and Presto!!!! Homemade personalized label or tag for my little creations. 


So much fun and so exciting!!


**************************************

Go on over to my Etsy Shop and check out a few things I made.

Click on the picture and it will take you right to the page. Thanks again for looking. 


Preciate it much!!!!


Handmade Crochet White Flower Anklet bracelet Wedding Wear

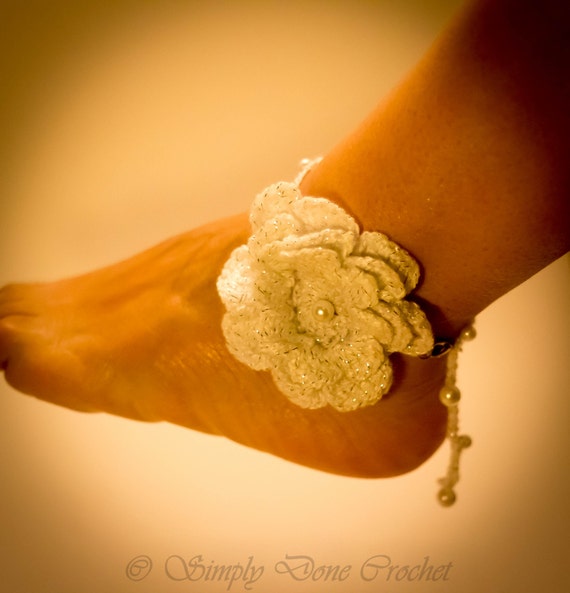
New at my shop:  a very sweet and delicate flower and pearl anklet.  Perfect for this summer to show off those great legs. ;)


Handmade Crochet Ring Sparkly Red
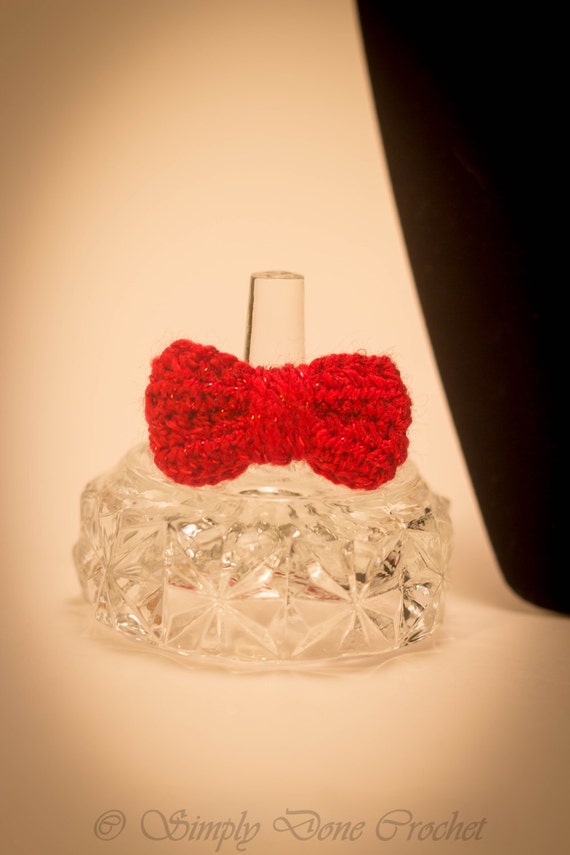
Trying to get with the style, I made this adorable adjustable sparkly bow ring.

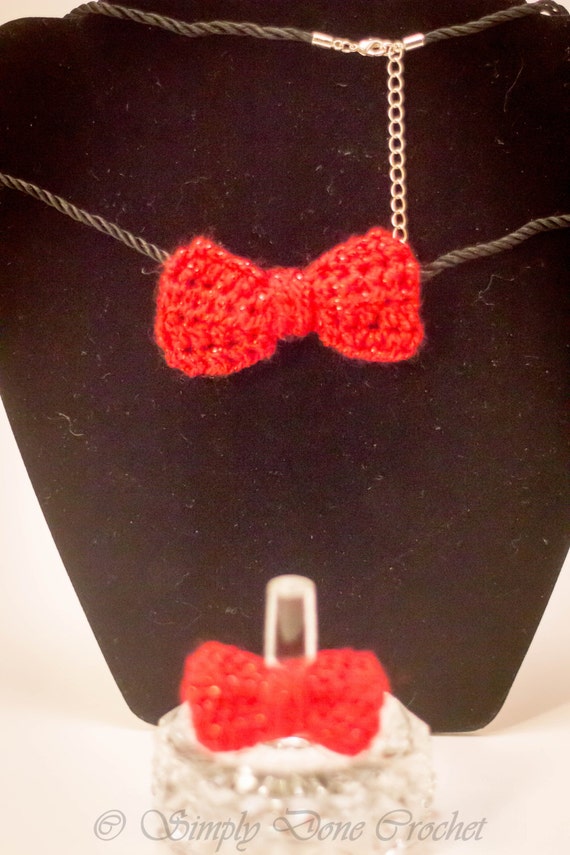
...and here is it's matching necklace.

Handmade Crocheted Red Bow Necklace


I also made these cute cowboy/girl hats for photo props or just fun.
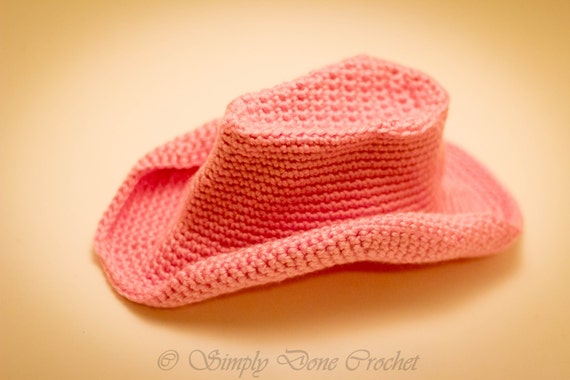
Pretty in pink. <3 


Crochet Cowboy Hat Tan Double Yarn 1-3 year old
<3 <3 

Thank for e-visiting with me today.  I LOVE your e-company. 

Keep
always in your life,

AND

in your heart.


Tuesday, April 8, 2014

Where is Spring???


So, where is Spring again???

Yes, here we are again, but I regret to say that I am very disappointed with the start of this Spring.  It has been freeeeeezing. Brrrrr.   Even the poor trees don't want to bloom.  But, I have not wasted any time and have kept myself busy getting my Etsy shop going.  I have added a few more items that I have been working on.  Mostly, I have made some new camera lens pals.  They are really fun to make and every time I make one, another idea pops into my head.  :) So, yes, new ones are on their way.  It's a work in progress.  I have made a few and decided I didn't really like how they turned out so....FROOGGG IT!!!!


I also made a really simple, yet awesome light box.  It was very easy to make and very inexpensive, but, it works great.  It makes such a BIG difference in the quality of the pictures.  I would recommend everyone interested to check out the link and try it out.  

Here is what you'll need:
  • Nice sturdy box (free)
  • Tissue paper (craft store or Target)
  • Tape
  • Poster Board (Target)
  • Two or three light sources (I got mine at the second hand store CHEAP!!)
Here is the YouTube video I used to make mine.  Simple!!!


Here it is!!!  I did not use fancy light bulbs.  You can do that for better lighting as well.  As you can see I only have one light source in the picture.  You can put a light source on each side and/or one above.  I just used the top light and it works pretty nicely.  


(Before the light box)

(After the light box)

Give it a go and let me know how it works out.  I'd love to see how yours turns out.  :)


I think I shared the page that I got the camera lens buddy tutorial from before, but here it is again.


Thank you,  Kristin Hankins.

  I do mine a bit different.  I use double yarn for a sturdier outcome so the number of stitches is less.  I hope to be able to write out my pattern soon.  

******************************************************
Here are my latest items.


If interested in purchasing any, please visit my shop, or mail me directly. 


I appreciate all the visits.  Please feel free to leave me a message.  I love to make new friends.  I hope I have helped inspire new ideas as I have been inspired.  


Keep
always in your heart. 

And as always...

May your yarn ball NEVER run out.


OUT!!!


Saturday, March 15, 2014

It almost SPRING!!!!

I am so excited because Spring is almost here! 

Spring is truly my favorite season.  I absolutely love that it is the beginning of new life. I can't wait to see the trees budding and the flowers blooming and the sun warming everything up.  


Here is a quote that I really like.

“It's spring fever. That is what the name of it is. And when you've got it, you want—oh, you don't quite know what it is you do want, but it just fairly makes your heart ache, you want it so!” 
― Mark Twain


If anyone loves to welcome in the season with some great activities, here is a nice link to Pinterest. I'm going to try to do some of these with the grands. ;)


************************************************


Well, I have made a few more things for some friends and have added them to my Etsy page for anyone that would like to check it out.  Please share it with friends and family. 


************************************************


I made this adorably cute little crown for may friend from work.  She just had a beautiful little baby girl.  I will hopefully be able to post pictures of her soon.  Congratulations to Dalilah and her beautiful family. 


This colorful party hat was also made for a friend from work.  Her little niece is having a first birthday and she asked if I could make her this cute topper.    I can't wait to see pictures. <3


The candy buddies are going to be used as center pieces and gifts for the guests.  I think these guys are so cute.  I also think they need party hats too. :D


Well, this is all I have for now.  Hope to be adding more soon.  Stay tuned. But mostly thanks for stopping by. Much appreciated. 

Toodle LOOOO for now.  


+


And as always...

May your yarn ball NEVER run out.


Sunday, March 9, 2014

My new shop.

I started my ETSY SHOP!!! 


First of all,  I want to wish my amazing grand-daughter Kacey Elena a very, very happy first birthday. 

Kacey, grandma and grandpa love you with all our heart and soul.  We wish for you love, compassion, peace and everything that you may need to make you the happiest little person in this world. May you always have joy in your life. 

birthday celebration emoticon
 Unfortunately, she was a bit under the weather, but she was still gorgeous. Just look at these pictures. 


Okay NOW!!!!!

I am super excited to announce that I have re-opened my Etsy shop, "Simply Done Crochet", and plan to really try my best to create and share my creations with anyone that may need one for their little ones or maybe for their photography business.  
Here's the link.  Check it out.  https://www.etsy.com/shop/SimplyDoneCrochet


In keeping with the season, here is the newest hat that I made; An Irish Bowler for an adorable cute little baby.  Can you imagine this cute little hat on top of the cutest little nakie newborn head, and that huge tie just snuggled under a precious little chin? 


These are a few of the things that I have made and sold recently.  


Lavender and yellow receiving blanket.


Newborn lavender and cream headband with matching leg warmers.


Newborn purple and teal headband with matching leg warmers.


3" owls for a baby shower.  They are appliques, but were used as party favors and hung from centerpieces.
These owls were inspired by: https://www.etsy.com/shop/MariMartin

This little cookie eating monster right here,
 
was my first sale on Etsy. 


These camera lens buddies are pretty simple to make.  If you can crochet, you can pretty much come up with anything you like.  Here is a link to a basic buddy pattern. This girl has really simple step by step instructions with pictures.  She's awesome!!!

http://4hankins.blogspot.com/2012_10_01_archive.html


*********************************************

My grandson just outgrew his little hats, so of course I had to make him a new one.  So I made him this adorable aviator hat.  


Pattern was created by: Yarnovations.com Check out her Etsy shop.  She has gorgeous things there

 I also made this petite headband, made for a toddler.  I wanted it for Luna, but she won't have it.  She doesn't like things on her head, unless it's a hat for outside. It's too bad because, it looks adorable.

 Interested? Give me a ring-a-ding. 
and by that I mean message me on Facebook https://www.facebook.com/crabbieme
or email me at: www.crabbieme.martha@gmail.com


Headband with interchangeable flowers.  Just connect to the button. 

Please check out this shop.  It's where I got the idea for this headband/warmer.  https://www.etsy.com/shop/YarnBlossomBoutique


 ❀  ❀  ❀  ❀  ❀  ❀  
(The flowers are a message for spring to hurry the heck up. ;) )

 Okay, so here's my latest experiment.  I decided that since I was concentrating on newborn props for photos and such, I should maybe add some tutus to my collection.  They seem pretty easy to make. Well, I tried it out, and here is my first attempt at a tutu.  The picture really doesn't do it justice.  It is adorable in person. 


  I will definitely be making me some tutus. Wish me luck!!


***************************************

And with this I bid you Adieu. (for now)

Peace and Love Always!!


+


And as always.......
May Your Yarn Ball Never Run Out.